Monday, May 28, 2018
Sunday, May 28, 2017
Prompt to press F1/F2 each time computer boots
New hardware has been recently installed
 If new hardware has been recently installed in your computer, it is likely that you are receiving the prompt "Press F1 or F2 to enter setup" because the BIOS needs to verify that your new hardware is properly configured. Enter the CMOS setup, save the settings and exit. If you continue to get errors, continue to the next step.
Error or confliction with settings in CMOS
If no new hardware has been added or you continue to get this prompt, verify no error or conflictions exist in CMOS. Press the indicated key to enter setup and verify that all settings are correct.
Tip: If your time and date are not set correctly, your CMOS battery is more than likely bad. Try setting the correct time and date, save the settings and then reboot. If after turning off the computer the time and date get reset again, replace the CMOS battery.
If the time and date are correct and everything else appears to be correct, try resetting the CMOS values to their default settings.
CMOS battery is bad or failing
If you continue to receive the prompt to enter setup each time the computer boots up and you have attempted to follow the above suggestions, your CMOS battery is bad. We recommend that you replace the CMOS battery.
How to enter the BIOS or CMOS setup
Because of the wide variety of computer and BIOS manufacturers over the evolution of computers, there are numerous ways to enter the BIOS or CMOS Setup. Below is a listing of most of these methods, as well as other recommendations for entering the BIOS setup.
Note: Apple, or Mac, computers do not have a BIOS and instead utilize an EFI, which does not need to modified based on the hardware in the computer, like a BIOS. The EFI provides better integration between hardware and software for Apple computers, virtually eliminating the need for a BIOS.
Note: This document does not help if you cannot enter the CMOS setup with password.
New computers
Computers manufactured in the last few years allow you to enter the BIOS setup using one of the five keys shown below during the boot process.
Note: F1, F2, and F10 are all function keys on the top of the keyboard.
* If pressing F2 opens a diagnostics tool, your setup key is likely F10
** F10 is also used for the boot menu. If F10 opens a boot menu, your setup key is likely F2.
Setup keys are to be pressed as the computer is booting up. Most users will see a message similar to the example below upon startup. Some older computers may also display a flashing block to indicate when to press the F1 or F2 keys.
Press <F2> to enter BIOS setup
Tip: If your computer is new and you are unsure of what key to press when the computer is booting, try pressing and holding one or more keys on the keyboard to cause a stuck key error. Once you get this error, you should have the option to continue or enter setup.
Note: If you are still unable to enter the BIOS using the methods listed above, check the motherboard's manual for the appropriate key to enter BIOS. Documentation for the motherboard may also be found on the manufacturer's website.
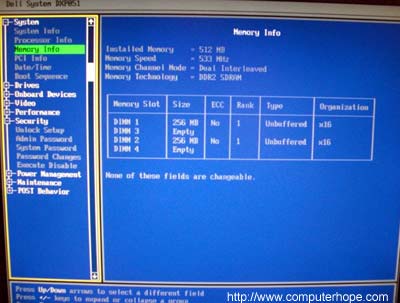
Once you have successfully entered the CMOS setup, you should see a screen similar to the example below. Your CMOS setup may look a little different, depending on the manufacturer, but should still have most of the same options in the menu on the left or along the bottom of the screen.
How do I change and save changes in CMOS setup?
Once in CMOS setup, the method for changing the settings often depends on the BIOS manufacturer. You may use the arrow keys along with the Enter key to select categories and change their values. Some manufacturers may have you press the Page up and Page down keys to change the values.
Tip: All manufacturers show which keys navigate on the bottom or right-hand side of the screen.
I cannot change the values to a setting I want to use.
If you are trying to change the clock, speed, or other settings and do not have the option available, it is because it is not supported by the motherboard. If you believe it should be supported, you may need a BIOS update.
Tip: If changes you made appear to revert back to default settings or the date and time setting in the BIOS keeps falling behind, you may need to replace the CMOS battery.
How do I save the changes?
If any changes are made, you need to save those changes, which is typically done by pressing the F10 key on the keyboard. If F10 does not work, look at the bottom or top of the screen for the key that is used to save the settings.
Older computers
Unlike the computers of today, older computers (before 1995) had numerous methods of entering the BIOS setup. Below is a listing of key sequences to press as the computer is booting to enter the BIOS setup.
- Ctrl+Alt+Esc
- Ctrl+Alt+Ins
- Ctrl+Alt+Enter
- Ctrl+Alt+S
- Page Up key
- Page Down key
ACER BIOS
If your computer cannot boot or you want to restore the BIOS back to its bootable settings and your computer uses an ACER BIOS, press and hold the F10 key as you turn on the computer. While continuing to hold the F10 key, you should hear two beeps indicating that the settings are restored.
AMI BIOS
Older AMI BIOS could be restored back to bootable settings by pressing and holding the Insert key as the computer is booting.
BIOS or CMOS diskettes
Early 486, 386, and 286 computers required a floppy disk to enter the BIOS setup. These diskettes may be referred to as ICU, BBU, or SCU disks. Because these diskettes are unique to your computer manufacturer, you must obtain the diskettes from them. See the computer manufacturers list for contact information.
Early IBM computers
Some early IBM computers require you to press and hold both mouse buttons as the computer boots to enter the BIOS setup.
Other suggestions
Finally, if none of the above suggestions allow access to your CMOS setup, you can create a stuck key error, causing the CMOS setup prompt to appear until you press a key to continue. To do this, press and hold any key on the keyboard and do not let go (you may get several beeps as you are doing this). Keep pressing the key until the computer stops booting and you have the option to enter setup.
My computer is running slow, what steps can I do to fix it?
Tip: This page only covers an overall slow computer and not a computer that has a slow boot up or slow Internet.
Below are steps for Microsoft Windows users that can help speed up the computer or determine why the computer is running slow.
Reboot
If your computer has not been rebooted recently, make sure to reboot it before following any of the steps below.
Background programs
One of the most common reasons for a slow computer are programs running in the background. Remove or disable any TSRs and startup programs that automatically start each time the computer boots.
Tip: To see what programs are running in the background and how much memory and CPU they are using, open Task Manager. If you are running Windows 7 or higher, run Resmon to get a better understanding of how your computer is being used.
If you have an antivirus scanner on the computer, spyware protection program, or another security utility, make sure it is not scanning your computer in the background. If a scan is in progress, it can decrease the overall performance of your computer. If this is the case, allow the scan to complete, and the computer's performance should improve.
Delete temp files
As a computer runs programs, temporary files are stored on the hard drive. Deleting these temp files can help improve computer performance.
First, we suggest using the Windows Disk Cleanup utility to delete temporary files and other files no longer needed on the computer.
 Unfortunately, the Disk Cleanup may not delete every file in the temp directory. Therefore, we also suggest deleting temporary files manually. To do this, open the Start Menuand typ e%temp% in the Search field. In Windows XP and prior, click the Run option in the Start Menu and enter %temp% in the Run field. Press Enter and a Temp folder should open. You can delete all files found in this folder and, if any files are in use and cannot be deleted, they can be skipped.
Free hard drive space
Verify that there is at least 200-500MB of free hard drive space. This available space allows the computer to have room for the swap file to increase in size, as well as room for temporary files.
Bad, corrupted or fragmented hard drive
- Run ScanDisk, chkdsk, or something equivalent to verify there is nothing physically wrong with the computer's hard drive.
- Run Defrag to help ensure that data is arranged in the best possible order.
- Use other software tools to test the hard drive for any errors by looking at the SMART of the drive.
Scan for malware
Today, spyware and other malware is a big cause of many computer problems, including a slow computer. Even if an antivirus scanner is installed on the computer, we recommend running a malware scan on the computer. Use the free version of Malwarebytes to scan your computer for malware.
Scan for viruses
If your computer is infected with one or more viruses, this can cause your computer to run slow. If your computer does not have an antivirus program installed, you can run Trend Micro's free Housecall online utility to scan for viruses on your computer, as well as remove them. It is also recommended that you install an antivirus program for active protection against viruses.
Hardware conflicts
- Verify that the Device Manager has no conflicts. If any exist, resolve these issues as they could be the cause of your problem.
Update Windows
- Make sure you have all the latest Windows updates installed on the computer.
- If you are on the Internet when your computer is slow,make sure all browser plugins are up-to-date. You can also try disabling browser plug-ins to see if one of them is causing the slowness.
Update your drivers
Make sure you have the latest drivers for your computer hardware, especially the latest video drivers. Having out-of-date drivers can cause an assortment of issues, including slow performance.
Reboot computer again
If you have done any of the above steps but your computer is still acting slow try rebooting the computer again at this point.
Memory upgrade
 If you have had your computer for more than two years, you may need more memory. Today, we suggest computers have a minimum of 1 GB of memory (RAM) for 32-bit system and 2 GB for a 64-bit system. By having enough memory for programs to run within memory, your computer will not need to swap information stored in memory to the swap file. If the hard drive light is constantly active, it can be an indication the computer is frequently swapping information between your memory and hard drive.
- Determining how much RAM is installed and available.
- How much memory or RAM should my computer have?
- What type of computer memory to use in a memory upgrade?
Hard drive upgrade
 One of the biggest bottlenecks of a computer is the hard disk drive. Upgrading from a hard drive to a Solid State Drive (SSD) can significantly improve the performance of a computer.
Run Registry cleaner
We normally do not recommend Registry cleaners. However, if you have followed all of the above steps and your computer is still slow, try running a Registry cleaner on the computer.
Computer or processor is overheating
Make sure your computer and processor is not overheating. Excessive heat can cause a significant decrease in computer performance because most processors automatically reduce the speed of the processor to help compensate for heat-related issues.
Dust, dirt, and hair can also constrict proper airflow inside your computer, which can cause a computer to overheat. Make sure your computer case is clean and fans are not obstructed.
Erase computer and start over
If none of the above solutions resolve your issues, another option is to either reinstall Windows or erase everything and then start over.
Erasing everything and starting over can increase performance by getting rid of old software or drivers that may be on the computer and causing the computer to be slow. Installing a fresh copy of Windows, software programs, and the latest drivers help verify there are no software related issues causing your computer to be slow.
Hardware issues
Finally, if your computer is still slow after trying all of the above recommendations, there may have a more serious hardware related issue, such as a failing component in the computer. Examples of failing hardware could include a failing or bad hard drive, CPU, RAM, motherboard, or another component.
You can run hardware diagnostic tests using the Ultimate Boot CD (UBCD) utility. This utility provides many diagnostic tests that you can run and determine if your computer has a bad piece of hardware.
Old computer
If your computer is more than five years old, the age of the computer could be the cause of the slow performance. As more advanced software programs are released, they are optimized to run more efficiently on newer computers. Older computers are not able to run these new programs as well, which can cause them to perform more slowly. We recommend that you consider purchasing a new computer or accept that your computer is not going to be as fast as a newer computer.
Getting into Windows Safe Mode
Note: Accessing Safe Mode for Windows requires the use of a working keyboard. If the keyboard on your computer does not work, you will not be able to access Safe Mode.
- Windows 10 users
- Windows 8 users
- Windows 7 and Vista users
- Windows XP and 2000 users
- Windows 98 and ME users
- Windows 95 users
- How to get out of Safe Mode.
- Which Safe Mode option should I choose?
- Unable to get into Windows Safe Mode
- How to boot your phone into Safe Mode
- Smartphone always boots into Safe Mode
 Microsoft Windows 10 users
- Press the Windows key, type Change advanced startup options, and then press Enter.
- Under the Recovery tab, select the Restart now option under Advanced startup.
- After a moment, you'll see a menu with three options. Select the Troubleshoot option.
- Select Advanced options, Startup Settings, and then the Restart button.
- You should see a screen just like the one pictured to the right. Select your appropriate Safe Mode option by pressing the corresponding number on your keyboard.
Alternative method:
- Press the Windows key and the R key together to access the Run option.
- Type msconfig in the Open: field.
- In the System Configuration window, click on the Boot tab.
- On the bottom left, in the Boot options section, check the box for Safe boot.
- Select the Minimal option, then Apply, and then the OK.
- Restart the computer and it should load into Safe Mode.

Note: If you use the above option to access Safe Mode, you need to follow the same steps and uncheck the Safe boot option when you're done. Otherwise, your computer will continue to automatically boot into Safe Mode each time you restart it.
Microsoft Windows 8 users
- Press the Windows key, type Change advanced startup options, and then press Enter.
- Under the Recovery tab, select the Restart now option under Advanced startup.
- After a moment, you'll see a menu with three options, select Troubleshoot.
- Select Advanced options, Startup Settings, and then the Restart button.
- You should see a screen just like the one pictured to the right. Select your appropriate Safe Mode option by pressing the corresponding number on your keyboard.
Alternative method 1
Note: The following method will not work if you have a solid state drive (SSD). If you have an SSD, try the next section.
- When the computer is booting, press and hold the Shift key, and tap the F8 key repeatedly until the Recovery screen appears.
- Click the See advanced repair options option on the Recovery screen.
- On the Choose an option screen, select the Troubleshoot option.
- Select Advanced options, and then Windows Startup Settings.
- On the Windows Start Settings screen, click the Restart option.
Note: If you have trouble getting to the Recovery screen in step 1 above, you may have to try it several times, with several reboots of your computer.
When the computer restarts, you should see the standard Choose Advanced Options screen, similar to the example below. Use your arrow keys to move to Safe Mode and press Enter.
Choose Advanced Options for: Microsoft Windows 8
(Use the arrow keys to highlight your choice.)
Repair Your Computer
Safe Mode
Safe Mode with Networking Safe Mode with Command Prompt
Enable Boot Logging
Enable low-resolution video Debugging Mode Disable automatic restart on system failure Disable Driver Signature Enforcement Disable Early Launch Anti-Malware Driver
Start Windows Normally
Description: Start Windows with only the core drivers and services. Use
when you cannot boot after installing a new device or driver. |
Alternative method 2:
- Press the Windows key and the R key together to access the Run option.
- Type msconfig in the Open: field.
- In the System Configuration window, click on the Boot tab.
- On the bottom left, in the Boot options section, check the box for Safe boot.
- Select the Minimal option, then Apply, and then the OK.
- Restart the computer and it should load into Safe Mode.

Note: If you use the above option to access Safe Mode, you need to follow the same steps and uncheck the Safe boot option when you're done. Otherwise, your computer will continue to automatically boot into Safe Mode each time you restart it.
Microsoft Windows 7 and Windows Vista users
Tip: If you are running Safe Mode because you cannot get into Windows, you may want to first try loading the last known good configuration.
To get into the Windows Vista and Windows 7 Safe Mode, as the computer is booting, press and hold your F8 Key, which should bring up the Choose Advanced Options screen as shown below. Use your arrow keys to move highlight Safe Mode and press your Enter key.
Note: On some computers, if you press and hold a key as the computer is booting, you will get a stuck key message. If this occurs, continuously tap F8 upon startup rather than holding it.
Trouble Getting into Safe mode - If after several attempts you are unable to get the Windows Advanced Options Menu screen to come up by pressing F8, turn off your computer while it is loading into Windows. When the computer is turned on the next time, Windows should notice that the computer did not successfully boot and give you the Safe Mode screen like the one shown below.
Choose Advanced Options for: Microsoft Windows Vista
Please select an option:
Safe Mode
Safe Mode with Networking Safe Mode with Command Prompt
Enable Boot Logging
Enable low-resolution video (640x480) Last Known Good Configuration (advanced) Directory Services Restore Mode Debugging Mode Disable automatic restart on system failure Disable Driver Signature Enforcement
Start Windows Normally
Description: Start Windows with only the core drivers and services. Use
when you cannot boot after installing a new device or driver. |
Once you're done in Safe Mode, if you want to get back into normal Windows, restart the computer. See the below how to get out of Safe Mode if you have further questions.
Alternative method:
- Press the Windows key and the R key together to access the Run option.
- Type msconfig in the Open: field.
- In the System Configuration window, click on the Boot tab.
- On the bottom left, in the Boot options section, check the box for Safe boot.
- Select the Minimal option, then Apply, and then the OK.
- Restart the computer and it should load into Safe Mode.

Note: If you use the above option to access Safe Mode, you need to follow the same steps and uncheck the Safe boot option when you're done. Otherwise, your computer will continue to automatically boot into Safe Mode each time you restart it.
Windows XP and Windows 2000 users
Tip: If you are running Safe Mode because you cannot get into Windows, you may want to first try loading the last known good configuration.
To get into the Windows 2000 and XP Safe mode, as the computer is booting, press and hold your F8 Key, which should bring up the Windows Advanced Options Menuscreen as shown below. Use your arrow keys to move to highlight the Safe Mode option and press your Enter key.
Note: On some computers, if you press and hold a key as the computer is booting, you will get a stuck key message. If this occurs, continuously tap F8 upon startup, rather than holding it.
Trouble Getting into Windows 2000 or Windows XP Safe mode - If after several attempts you are unable to get the Windows Advanced Options Menu screen to come up by pressing F8, turn off your computer while it is loading into Windows. When the computer is turned on the next time, Windows should notice that the computer did not successfully boot and give you the Safe Mode screen.
Windows Advanced Options Menu
Please select an option:
Safe Mode
Safe Mode with Networking Safe Mode with Command Prompt
Enable Boot Logging
Enable VGA mode Last Known Good Configuration (your most recent settings that worked) Directory Services Restore Mode (Windows domain controllers only) Debugging Mode
Start Windows Normally
Reboot Return to OS Choices Menu
Use the up and down arrow keys to move the highlight to your choice.
|
Once you're done in Safe Mode, if you want to get back into normal Windows, restart the computer. See the below how to get out of Safe Mode if you have further questions.
Windows 98 and Windows ME users
To get into Windows 98 and ME Safe Mode, press and hold either the F8 or Ctrl key as the computer is booting up. If done properly, you should see the "Windows 98 Startup Menu" or "Windows ME Startup Menu" screen, similar to the example below. In this menu, choose option 3 by pressing the 3 key and then pressing Enter.
Note: On some computers, if you press and hold a key as the computer is booting, you will get a stuck key message. If this occurs, continuously tap F8 upon startup, rather than holding it.
Microsoft Windows 98 Startup Menu
=============================
1. Normal
2. Logged (\BOOTLOG.TXT) 3. Safe mode 4. Step-by-step confirmation 5. Command prompt only 6. Safe mode command prompt only
Enter a choice: 1
F5=Safe Mode Shift+F5=Command prompt Shift+F8= Step-by-step confirmation [N]
|
Once you're done in Safe Mode, if you want to get back into normal Windows, restart the computer. See the below how to get out of Safe Mode if you have further questions.
Windows 95 users
To get into Windows 95 Safe Mode, as the computer is booting, when you either hear a beep or when you see the message "Starting Windows 95." Press your F8 key on the top of your keyboard. If done properly, you should see the "Windows 95 Startup Menu" screen, similar to the example below. In this menu, choose option 3 by pressing the 3 key, and then pressing Enter.
Microsoft Windows 95 Startup Menu
=============================
1. Normal
2. Logged (\BOOTLOG.TXT) 3. Safe mode 4. Step-by-step confirmation 5. Command prompt only 6. Safe mode command prompt only
Enter a choice: 1
F5=Safe Mode Shift+F5=Command prompt Shift+F8= Step-by-step confirmation [N]
|
Once you're done in Safe Mode, if you want to get back into normal Windows, restart the computer. See the below how to get out of Safe Mode if you have further questions.
How to get out of Safe Mode
From Windows Safe Mode, click Start, Shutdown, and restart the computer to boot back into Normal Mode.
Note: Many users believe that they are still in Safe Mode because the colors or video may not look correct. Unless in the corners of the screen it says "Safe Mode", you are not in Safe Mode. If your colors are distorted or you have video problems see the below document.
If you are rebooting the computer and it is rebooting back into Safe Mode (it does say "Safe Mode" in each of the corners), it is likely another problem exists with Windows preventing it from loading into Normal Windows. We recommend you see the basic troubleshooting section for additional ideas that may help to resolve your issue.
Which Safe Mode option should I choose?
Users who are running later versions of Windows will get different options for different versions of Safe Mode. For example, you may have options for "Safe Mode", "Safe Mode with Networking", and "Safe Mode with Command Prompt." Below is a brief description of each of these different modes.
Safe Mode
The basic Safe Mode option is usually what most users will want to choose when troubleshooting their computer. The only downside is that this option has no additional support.
Safe Mode with Networking
Users who need access to the Internet or the network they're connected to while in Safe Mode should select this option. This mode is helpful for when you need to be in Safe Mode to troubleshoot, but also need access to the Internet so you can get updates, drivers, or other files to help troubleshoot your issue.
Safe Mode with Command Prompt
This version of Safe Mode gives you access to the command line (MS-DOS prompt).
Subscribe to:
Posts (Atom)
-
भारत में रीटेल क्षेत्र के भीतर प्रत्यक्ष विदेशी निवेश यानी एफडीआई नया नहीं है लेकिन अब तक यह एकल ब्रांड तक ही महदूद था. अब जबकि केंद्र सरका...
-
माननीय, पत्र के प्रारंभ में ही अपनी इस गुस्ताखी के लिए खेद व्यक्त करते है कि हम सीधे तौर पर आपसे मुखातिब हो रहे हैं. हालांकि आपके मंत्राल...
-
Many web pages that do not list the last date and time they updated, modified, or changed. This information can be determined by using one...
-
Because of the wide variety of computer and BIOS manufacturers over the evolution of computers, there are numerous ways to enter the BIOS...
-
Tip: This page only covers an overall slow computer and not a computer that has a slow boot up or slow Internet . Below are steps fo...
-
Note: Accessing Safe Mode for Windows requires the use of a working keyboard. If the keyboard on your computer does not work, you will no...
-
New hardware has been recently installed If new hardware has been recently installed in your computer, it is likely that you are receivi...
-
https://youtu.be/oACiAHAACiU
-
Table of Contents 13.1 ping 13.2 traceroute 13.3 DNS Tools 13.4 finger 13.5 telnet 13.6 The Secure shell 13.7 email ...
-
Over the years, Windows has gotten much better about how it handles networked printers. But if you want to share a printer over the networ...


