- Table of Contents
- 13.1 ping
- 13.2 traceroute
- 13.3 DNS Tools
- 13.4 finger
- 13.5 telnet
- 13.6 The Secure shell
- 13.7 email
- 13.8 Browsers
- 13.9 FTP Clients
- 13.10 Talking to Other People
There are a variety of networking programs that you can use. Some are handy for performing diagnostics to see if everything is working properly. Others (like mail readers and web browsers) are useful for getting your work done and staying in contact with other people.
13.1 ping
ping(8) sends an ICMP ECHO_REQUEST packet to the specified host. If the host responds, you get an ICMP packet back. Sound strange? Well, you can “ping” an IP address to see if a machine is alive. If there is no response, you know something is wrong. Here is an example conversation between two Linux users:It's instances like these that make ping a very useful day-to-day command. It provides a very quick way to see if a machine is up and connected to the network. The basic syntax is:User A: Loki's down again.
User B: Are you sure?
User A: Yeah, I tried pinging it, but there's no response.
% ping www.slackware.com |
13.2 traceroute
Slackware's traceroute(8) command is a very useful network diagnostic tool. traceroute displays each host that a packet travels through as it tries to reach its destination. You can see how many “hops” from the Slackware web site you are with this command:% traceroute www.slackware.com |
% traceroute www.slackware.com traceroute to www.slackware.com (204.216.27.13), 30 hops max, 40 byte packets 1 zuul.tdn (192.168.1.1) 0.409 ms 1.032 ms 0.303 ms 2 207.171.227.254 (207.171.227.254) 18.218 ms 32.873 ms 32.433 ms 3 border-sf-2-0-4.sirius.com (205.134.230.254) 15.662 ms 15.731 ms 16.142 ms 4 pb-nap.crl.net (198.32.128.20) 20.741 ms 23.672 ms 21.378 ms 5 E0-CRL-SFO-03-E0X0.US.CRL.NET (165.113.55.3) 22.293 ms 21.532 ms 21.29 ms 6 T1-CDROM-00-EX.US.CRL.NET (165.113.118.2) 24.544 ms 42.955 ms 58.443 ms 7 www.slackware.com (204.216.27.13) 38.115 ms 53.033 ms 48.328 ms |
13.3 DNS Tools
Domain Name Service (DNS for short) is that magical protocol that allows your computer to turn meaningless domain names like www.slackware.com into meaningful IP address like 64.57.102.34. Computers can't route packets to www.slackware.com, but they can route packets to that domain name's IP address. This gives us a convenient way to remember machines. Without DNS we'd have to keep a mental database of just what IP address belongs to what computer, and that's assuming the IP address doesn't change. Clearly using names for computers is better, but how do we map names to IP addresses?
13.3.1 host
host(1) can do this for us. host is used to map names to IP addresses. It is a very quick and simple utility without a lot of functions.% host www.slackware.com www.slackware.com is an alias for slackware.com. slackware.com has address 64.57.102.34 |
13.3.2 nslookup
nslookup is a tried and true program that has weathered the ages. nslookup has been deprecated and may be removed from future releases. There is not even a man page for this program.% nslookup 64.57.102.34 Note: nslookup is deprecated and may be removed from future releases. Consider using the `dig' or `host' programs instead. Run nslookup with the `-sil[ent]' option to prevent this message from appearing. Server: 192.168.1.254 Address: 192.168.1.254#53 Non-authoritative answer: www.slackware.com canonical name = slackware.com. Name: slackware.com Address: 64.57.102.34 |
13.3.3 dig
The meanest dog in the pound, the domain information groper, dig(1) for short, is the go-to program for finding DNS information. dig can grab just about anything from a DNS server including reverse lookups, A, CNAME, MX, SP, and TXT records. dig has many command line options and if you're not familiar with it you should read through it's extensive man page.% dig @192.168.1.254 www.slackware.com mx ; <<>> DiG 9.2.2 <<>> @192.168.1.254 www.slackware.com mx ;; global options: printcmd ;; Got answer: ;; ->>HEADER<<- opcode: QUERY, status: NOERROR, id: 26362 ;; flags: qr rd ra; QUERY: 1, ANSWER: 2, AUTHORITY: 2, ADDITIONAL: 2 ;; QUESTION SECTION: ;www.slackware.com. IN MX ;; ANSWER SECTION: www.slackware.com. 76634 IN CNAME slackware.com. slackware.com. 86400 IN MX 1 mail.slackware.com. ;; AUTHORITY SECTION: slackware.com. 86400 IN NS ns1.cwo.com. slackware.com. 86400 IN NS ns2.cwo.com. ;; ADDITIONAL SECTION: ns1.cwo.com. 163033 IN A 64.57.100.2 ns2.cwo.com. 163033 IN A 64.57.100.3 ;; Query time: 149 msec ;; SERVER: 192.168.1.254#53(192.168.1.254) ;; WHEN: Sat Nov 6 16:59:31 2004 ;; MSG SIZE rcvd: 159 |
13.4 finger
finger(1) will retrieve information about the specified user. You give finger a username or an email address and it will try to contact the necessary server and retrieve the username, office, telephone number, and other pieces of information. Here is an example:% finger johnc@idsoftware.com |
- Username
- Room number
- Home phone number
- Work phone number
- Login status
- Email status
- Contents of the .plan file in the user's home directory
- Contents of the .project file in the user's home directory
Many users finger their own account from a remote machine to quickly see if they have new email. Or, you can see a user's plan or current project.
Like many commands, finger has options. Check the man page for more information on what special options you can use.
13.5 telnet
Someone once stated that telnet(1) was the coolest thing he had ever seen on computers. The ability to remotely log in and do stuff on another computer is what separates Unix and Unix-like operating systems from other operating systems.telnet allows you to log in to a computer, just as if you were sitting at the terminal. Once your username and password are verified, you are given a shell prompt. From here, you can do anything requiring a text console. Compose email, read newsgroups, move files around, and so on. If you are running X and you telnet to another machine, you can run X programs on the remote computer and display them on yours.
To login to a remote machine, use this syntax:
% telnet <hostname> |
 | telnet does not encrypt the information it sends. Everything is sent in plain text, even passwords. It is not advisable to use telnet over the Internet. Instead, consider the Secure Shell. It encrypts all traffic and is available for free. |
13.5.1 The other use of telnet
Now that we have convinced you not to use the telnet protocol anymore to log into a remote machine, we'll show you a couple of useful ways to use telnet.You can also use the telnet command to connect to a host on a certain port.
% telnet <hostname> [port] |
In the next figure you'll see how you can telnet to a HTTP server on port 80, and get some basic information from it.
Figure 13-1. Telnetting to a webserver
You can do the same for other plain-text protocols, as long as you know what port to connect to, and what the commands are.% telnet store.slackware.com 80 Trying 69.50.233.153... Connected to store.slackware.com. Escape character is '^]'. HEAD / HTTP/1.0 HTTP/1.1 200 OK Date: Mon, 25 Apr 2005 20:47:01 GMT Server: Apache/1.3.33 (Unix) mod_ssl/2.8.22 OpenSSL/0.9.7d Last-Modified: Fri, 18 Apr 2003 10:58:54 GMT ETag: "193424-c0-3e9fda6e" Accept-Ranges: bytes Content-Length: 192 Connection: close Content-Type: text/html Connection closed by foreign host. % |
13.6 The Secure shell
Today, secure shell basks in the adoration that telnet once enjoyed. ssh(1) allows one to make a connection to a remote machine and execute programs as if one were physically present; however, ssh encrypts all the data travelling between the two computers so even if others intercept the conversation, they are unable to understand it. A typical secure shell connection follows.% ssh carrier.lizella.net -l alan The authenticity of host 'carrier.lizella.net (192.168.1.253)' can't be established. RSA key fingerprint is 0b:e2:5d:43:4c:39:4f:8c:b9:85:db:b2:fa:25:e9:9d. Are you sure you want to continue connecting (yes/no)? yes Warning: Permanently added 'carrier.lizella.net' (RSA) to the list of known hosts. Password: password Last login: Sat Nov 6 16:32:19 2004 from 192.168.1.102 Linux 2.4.26-smp. alan@carrier:~$ ls -l MANIFEST -rw-r--r-- 1 alan users 23545276 2004-10-28 20:04 MANIFEST alan@carrier:~$ exit logout Connection to carrier.lizella.net closed. |
13.7 email
Electronic mail is one of the most popular things one can do on the Internet. In 1998, it was reported that more electronic mail was sent than regular mail. It is indeed common and useful.Under Slackware, we provide a standard mail server, and several mail clients. All of the clients discussed below are text-based. A lot of Windows users may be against this, but you will find that a text based client is very convenient, especially when checking mail remotely. Fear not, there are many graphical e-mail clients such as KDE's Kmail. If you wish to use one of those check its help menu.
13.7.1 pine
pine(1) is not elm. Or so the saying goes. The University of Washington created their program for Internet news and email out of a need for an easy mail reader for their students. pine is one of the most popular email clients in use today and is available for nearly every flavor of Unix and even Windows.You will see a menu of commands and a row of command keys at the bottom. pine is indeed a complex program, so we will not discuss every feature about it here.

To see what's in your inbox, type i. Your messages are listed with their date, author, and subject. Highlight the message you want and press enter to view it. Pressing r will start a reply to the message. Once you have written the response, type Ctrl+X to send it. You can press i to get back to the message listing.
If you want to delete a message, press d. It will mark the highlighted message for deletion. pine deletes the mail when you exit the program. pine also lets you store your mail in folders. You can get a listing of folders by pressing l. At the message listing, press s to save it to another folder. It will ask for the folder name to write the message to.
pine offers many, many features; you should definitely have a look at the man page for more information. It will contain the latest information about the program.
13.7.2 elm
elm(1) is another popular text-based email client. Though not quite as user friendly as pine, it's definitely been around a lot longer.By default, you are placed in your inbox. The messages are listed with the message number, date, sender, and subject. Use the arrow keys to highlight the message you want. Press Enter to read the message.
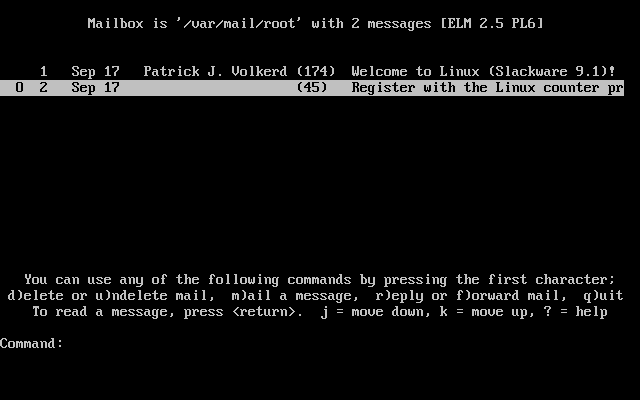
To compose a new message, type m at the main screen. The d key will flag a message for deletion. And the r key will reply to the current message you are reading. All of these keys are displayed at the bottom of the screen with a prompt.
The man page discusses elm in more detail, so you will probably want to consult that before using elm.
13.7.3 mutt
“All mail clients suck. This one just sucks less.” mutt's original interface was based on elm with added features found in other popular mailclients, resulting in a hybrid mutt.Some of mutt's features include:
- color support
- message threading
- MIME and PGP/MIME support
- pop3 and imap support
- support for multiple mailbox formats (mbox, MMDF, MH, maildir)
- highly customizable

you probably want to take a look at the muttrc manpage, which will tell you how to configure everything. or take a look at the included example muttrc file.
13.7.4 nail
nail(1) is a command line driven mail client. It is very primitive and offers pretty much nothing in the way of user interfaces. However, mailx is handy for times when you need to quickly mail something, scripting a bulk mailer, testing your MTA installation or something similar. Note that Slackware creates symbolic links to nail at /usr/bin/mail and /usr/bin/mailx. Any of these three commands executes the same program. In fact, you will most likely see nail referred to as mail.The basic command line is:
% mailx <subject> <to-addr> |
Here is an example of mailing a program source file to another person.
% cat randomfunc.c | mail -s "Here's that function" asdf@example.net |
13.8 Browsers
The first thing that people think about when they hear the word Internet is “surfing the net”. Or looking at websites using a web browser. This is probably by far the most popular use of the Internet for the average user.
Slackware provides popular graphical web browsers in the “XAP” series, as well as text mode browsers in the “N” series. We'll take a quick look at some of the most common options below.
13.8.1 lynx
lynx(1) is a text-based web browser. It is a very quick way of looking up something on the Internet. Sometimes graphics just get in the way if you know exactly what you're after.To start lynx, just type lynx at the prompt:
% lynx |
% lynx http://www.slackware.com |
There are many other commands in lynx. You can either consult the man page, or type h to get the help screen for more information.
13.8.2 links
Just like lynx, links is a textmode web browser, where you do all the navigation using the keyboard. However, when you press the Esc key, it will activate a very convenient pulldown menu on the top of the screen. This makes it very easy to use, without having to learn all the keyboard shortcuts. People who do not use a text browser every day will appreciate this feature.links seems to have better support for both frames and tables, when compared to lynx.
13.8.3 wget
wget(1) is a command line utility that will download files from a specified URL. While not an actual web-browser, wget is used primarily to grab whole or partial web sites for offline viewing, or for fast download of single files from HTTP or FTP servers instead. The basic syntax is:% wget <url> |
% wget --recursive http://www.slackware.com |
wget can also download files from FTP sites; just specify an FTP URL instead of an HTTP one.
% wget ftp://ftp.gnu.org/gnu/wget/wget-1.8.2.tar.gz
--12:18:16--  ftp://ftp.gnu.org/gnu/wget/wget-1.8.2.tar.gz
           => `wget-1.8.2.tar.gz'
Resolving ftp.gnu.org... done.
Connecting to ftp.gnu.org[199.232.41.7]:21... connected.
Logging in as anonymous ... Logged in!
==> SYST ... done.   ==> PWD ... done.
==> TYPE I ... done. ==> CWD /gnu/wget ... done.
==> PORT ... done.   ==> RETR wget-1.8.2.tar.gz ... done.
Length: 1,154,648 (unauthoritative)

100%[==================================>] 1,154,648     209.55K/s    ETA 00:00

12:18:23 (209.55KB/s) - `wget-1.8.2.tar.gz' saved [1154648]
|
13.9 FTP Clients
FTP stands for the File Transfer Protocol. It allows you to send and receive files between two computers. There is the FTP server and the FTP client. We discuss the client in this section.For the curious, the “client” is you. The “server” is the computer that answers your FTP request and lets you login. You will download files from and upload files to the server. The client cannot accept FTP connections, it can only connect to servers.
13.9.1 ftp
To connect to an FTP server, simply run the ftp(1) command and specify the host:% ftp <hostname> [port] |
Once connected, you will be at the ftp> prompt. There are special commands for FTP, but they are similar to other standard commands. The following shows some of the basic commands and what they do:
Table 13-1. ftp commands
You can also use some of the following commands which are quite self-explanatory: chmod, delete, rename, rmdir. For a complete list of all commands and their meaning, just type help or ? and you'll see a complete listing on screen.| Command | Purpose |
|---|---|
| ls | List files |
| cd <dirname> | Change directory |
| bin | Set binary transfer mode |
| ascii | Set ASCII transfer mode |
| get <filename> | Download a file |
| put <filename> | Upload a file |
| hash | Toggle hash mark stats indicator |
| tick | Toggle byte counter indicator |
| prom | Toggle interactive mode for downloads |
| mget <mask> | Download a file or group of files; wildcards are allowed |
| mput <mask> | Upload a file or group of files; wildcards are allowed |
| quit | Log off the FTP server |
FTP is a fairly simple program to use, but lacks the user interface that many of us are used to nowadays. The man page discusses some of the command line options for ftp(1).
ftp> ls *.TXT 200 PORT command successful. 150 Opening ASCII mode data connection for /bin/ls. -rw-r--r-- 1 root 100 18606 Apr 6 2002 BOOTING.TXT -rw-r--r-- 1 root 100 10518 Jun 13 2002 COPYRIGHT.TXT -rw-r--r-- 1 root 100 602 Apr 6 2002 CRYPTO_NOTICE.TXT -rw-r--r-- 1 root 100 32431 Sep 29 02:56 FAQ.TXT -rw-r--r-- 1 root 100 499784 Mar 3 19:29 FILELIST.TXT -rw-r--r-- 1 root 100 241099 Mar 3 19:12 PACKAGES.TXT -rw-r--r-- 1 root 100 12339 Jun 19 2002 README81.TXT -rw-r--r-- 1 root 100 14826 Jun 17 2002 SPEAKUP_DOCS.TXT -rw-r--r-- 1 root 100 15434 Jun 17 2002 SPEAK_INSTALL.TXT -rw-r--r-- 1 root 100 2876 Jun 17 2002 UPGRADE.TXT 226 Transfer complete. ftp> tick Tick counter printing on (10240 bytes/tick increment). ftp> get README81.TXT local: README81.TXT remote: README81.TXT 200 PORT command successful. 150 Opening BINARY mode data connection for README81.TXT (12339 bytes). Bytes transferred: 12339 226 Transfer complete. 12339 bytes received in 0.208 secs (58 Kbytes/sec) |
13.9.2 ncftp
ncftp(1) (pronounced "Nik-F-T-P") is an alternative to the traditional ftp client that comes with Slackware. It is still a text-based program, but offers many advantages over ftp, including:- Tab completion
- Bookmarks file
- More liberal wildcard uses
- Command history
ncftp /pub/linux/slackware > cd slackware-current/ Please read the file README81.TXT it was last modified on Wed Jun 19 16:24:21 2002 - 258 days ago CWD command successful. ncftp ...ware/slackware-current > ls BOOTING.TXT FAQ.TXT bootdisks/ CHECKSUMS FILELIST.TXT extra/ CHECKSUMS.asc GPG-KEY isolinux/ CHECKSUMS.md5 PACKAGES.TXT kernels/ CHECKSUMS.md5.asc PRERELEASE_NOTES pasture/ COPYING README81.TXT rootdisks/ COPYRIGHT.TXT SPEEKUP_DOCS.TXT slackware/ CRYPTO_NOTICE.TXT SPEEK_INSTALL.TXT source/ CURRENT.WARNING Slackware-HOWTO ChangeLog.txt UPGRADE.TXT ncftp ...ware/slackware-current > get README81.TXT README81.TXT: 12.29 kB 307.07 kB/s |
13.10 Talking to Other People
13.10.1 wall
wall(1) is a quick way to write a message to the users on a system. The basic syntax is:% wall [file] |
wall doesn't have many features, and apart from letting your users know that you're about to do some serious maintenance to the system, or even reboot it, so they have time to save their work and log off :)
13.10.2 talk
talk(1) allows two users to chat. It splits the screen in half, horizontally. To request a chat with another user, use this command:% talk <person> [ttyname] |

talk can also ring users on remote hosts. For the username you simply specify an email address. talk will try to contact that remote user on that host.
talk is somewhat limited. It only supports two users and is half-duplex.
13.10.3 ytalk
ytalk(1) is a backwards compatible replacement for talk. It comes with Slackware as the ytalk command. The syntax is similar, but has a few differences:% ytalk <username>[#ttyname] |
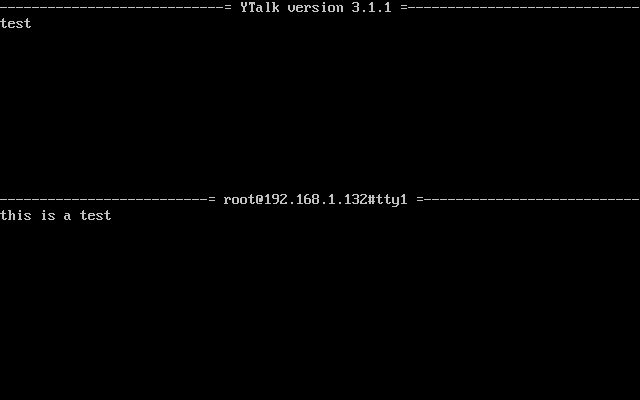
ytalk offers several advantages:
- It supports more than two users.
- A menu of options that can be brought up anytime with Esc.
- You can shell out while still in the talk session.
- Plus more...
Chapter 14 Security
- Table of Contents
- 14.1 Disabling Services
- 14.2 Host Access Control
- 14.3 Keeping Current
14.1 Disabling Services
The first step after installing Slackware should be to disable any services you don't need. Any services could potentially pose a security risk, so it is important to run as few services as possible (i.e. only those that are needed). Services are started from two main places - inetd and init scripts.14.1.1 Services started from inetd
A lot of the daemons that come with Slackware are run from inetd(8). inetd is a daemon that listens on all of the ports used by services configured to be started by it and spawns an instance of the relevant daemon when a connection attempt is made. Daemons started from inetd can be disabled by commenting out the relevant lines in /etc/inetd.conf. To do this, open this file in your favorite editor (e.g. vi) and you should see lines similar to this:telnet stream tcp nowait root /usr/sbin/tcpd in.telnetd |
#telnet stream tcp nowait root /usr/sbin/tcpd in.telnetd |
# kill -HUP $(cat /var/run/inetd.pid) |
14.1.2 Services started from init scripts
The rest of the services started when the machine starts are started from the init scripts in /etc/rc.d/. These can be disabled in two different ways, the first being to remove the execute permissions on the relevant init script and the second being to comment out the relevant lines in the init scripts.For example, SSH is started by its own init script at /etc/rc.d/rc.sshd. You can disable this using:
# chmod -x /etc/rc.d/rc.sshd |
# This must be running in order to mount NFS volumes. # Start the RPC portmapper: if [ -x /sbin/rpc.portmap ]; then echo "Starting RPC portmapper: /sbin/rpc.portmap" /sbin/rpc.portmap fi # Done starting the RPC portmapper. |
# This must be running in order to mount NFS volumes. # Start the RPC portmapper: #if [ -x /sbin/rpc.portmap ]; then # echo "Starting RPC portmapper: /sbin/rpc.portmap" # /sbin/rpc.portmap #fi # Done starting the RPC portmapper. |
14.2 Host Access Control
14.2.1 iptables
iptables is the packet filtering configuration program for Linux 2.4 and above. The 2.4 kernel (2.4.5, to be exact) was first introduced into Slackware (as an option) in version 8.0 and was made the default in Slackware 8.1. This section only covers the basics of its usage and you should check http://www.netfilter.org/ for more details. These commands can be entered into /etc/rc.d/rc.firewall, which has to be set as executable for these rules to take effect at startup. Note that incorrect iptablescommands can essentially lock you out of your own machine. Unless you are 100% confident in your skills, always ensure you have local access to the machine.The first thing most people should do is set the default policy for each inbound chain to DROP:
# iptables -P INPUT DROP # iptables -P FORWARD DROP |
# iptables -A INPUT -m state --state ESTABLISHED,RELATED -j ACCEPT |
# iptables -A INPUT -s 127.0.0.0/8 -d 127.0.0.0/8 -i lo -j ACCEPT |
The next thing to do would be to allow access to specific services running on your machine. If, for example, you wanted to run a web server on your machine, you would use a rule similar to this:
# iptables -A INPUT -p tcp --dport 80 -i ppp0 -j ACCEPT |
# iptables -A INPUT -p tcp -s 64.57.102.34 --dport 80 -i ppp0 -j ACCEPT |
# iptables -A INPUT -p icmp -j ACCEPT |
# iptables -t nat -A POSTROUTING -o ppp0 -j MASQUERADE |
# echo 1 > /proc/sys/net/ipv4/ip_forward |
IPV4_FORWARD=0 |
IPV4_FORWARD=1 |
14.2.2 tcpwrappers
tcpwrappers controls access to daemons at the application level, rather than at the IP level. This can provide an extra layer of security at times when IP-level access controls (e.g. Netfilter) are not functioning correctly. For example, if you recompile the kernel but forget to include iptables support, your IP level protection will fail but tcpwrappers will still help protect your system.Access to services protected by tcpwrappers can be controlled using /etc/hosts.allow and /etc/hosts.deny.
The majority of people would have a single line in their /etc/hosts.deny file to deny access to all daemons by default. This line would be:
ALL : ALL |
A lot of people would start by accepting all connections from localhost. This can be achieved using:
ALL : 127.0.0.1 |
sshd : 192.168.0.0/24 sshd : 192.168.0. |
sshd : .slackware.com |
14.3 Keeping Current
14.3.1 slackware-security mailing list
Whenever a security problem affects Slackware, an email is sent to all subscribers to the slackware-security@slackware.com mailing list. Reports are sent out for vulnerabilities of any part of Slackware, apart from the software in /extra or /pasture. These security announcement emails include details on obtaining updated versions of Slackware packages or work-arounds, if any.Subscribing to Slackware mailing lists is covered in Section 2.2.2.
14.3.2 The /patches directory
Whenever updated packages are released for a version of Slackware (usually only to fix a security problem, in the case of already released Slackware versions), they are placed in the /patches directory. The full path to these patches will depend on the mirror you are using, but will take the form /path/to/slackware-x.x/patches/.Before installing these packages, it is a good idea to verify the md5sum of the package. md5sum(1) is a commandline utility that creates a “unique” mathematical hash of the file. If a single bit of the file has been changed, it will generate a different md5sum value.
% md5sum package-<ver>-<arch>-<rev>.tgz 6341417aa1c025448b53073a1f1d287d package-<ver>-<arch>-<rev>.tgz |
If you have a file with the md5sum values in it, you can source it instead with the -c option to md5sum.
# md5sum -c CHECKSUMS.md5 ./ANNOUNCE.10_0: OK ./BOOTING.TXT: OK ./COPYING: OK ./COPYRIGHT.TXT: OK ./CRYPTO_NOTICE.TXT: OK ./ChangeLog.txt: OK ./FAQ.TXT: FAILED |
Chapter 15 Archive Files
15.1 gzip
gzip(1) is the GNU compression program. It takes a single file and compresses it. The basic usage is as follows:% gzip filename |
% gzip -9 filename |
Decompressing gzipped files can be done using two commands, which are really just the same program. gzip will decompress any file with a recognized file extension. A recognized extension can be any of the following: .gz, -gz, .z, -z, .Z, or -Z. The first method is to call gunzip(1) on a file, like so:
% gunzip filename.gz |
15.2 bzip2
bzip2(1) is an alternative compression program installed on Slackware Linux. It uses a different compression algorithm from gzip, which results in some advantages and some disadvantages. The main advantage for bzip2 is the compressed file size. bzip2 will almost always compress better than gzip. In some instances, this can result in dramatically smaller files. This can be a great advantage for people on slower modem connections. Also remember, when downloading software from a public ftp server, it's generally good netiquette to download the .bz2 files instead of the .gz files, as this results in less overhead for the generous people hosting the server.The disadvantage to bzip2 is that it is more CPU intensive than gzip. This means that bzipping a file will generally take longer and will use more of the CPU than gzipping the file would. When considering which compression program to use, you must weigh this speed vs. compressed size and determine which is more important.
The usage of bzip2 is nearly identical to gzip, so not much time will be spent discussing it. Like gunzip, bunzip2 is identical to bzip2 -d. The primary difference in practical usage is that bzip2 uses the .bz2 extension.
% bzip2 filename % bunzip2 filename.bz2 % bzip2 -9 filename |
15.3 tar
tar(1) is the GNU tape archiver. It takes several files or directories and creates one large file. This allows you to compress an entire directory tree, which is impossible by just using gzip or bzip2. tar has many command line options, which are explained in its man page. This section will just cover the most common uses of tar.
The most common use for tar is to decompress and unarchive a package that you've downloaded from a web site or ftp site. Most files will come with a .tar.gz extension. This is commonly known as a “tarball”. It means that several files were archived using tar and then compressed using gzip. You might also see this listed as a .tar.Z file. It means the same thing, but this is usually encountered on older Unix systems.
Alternatively, you might find a .tar.bz2 file somewhere. Kernel source is distributed as such because it is a smaller download. As you might have guessed, this is several files archived with tar and then bzipped.
You can get to all the files in this archive by making use of tar and some command line arguments. Unarchiving a tarball makes use of the -z flag, which means to first run the file through gunzip and decompress it. The most common way to decompress a tarball is like so:
% tar -xvzf filename.tar.gz |
That's quite a few options. So what do they all mean? The -x means to extract. This is important, as it tells tar exactly what to do with the input file. In this case, we'll be splitting it back up into all the files that it came from. -v means to be verbose. This will list all the files that are being unarchived. It is perfectly acceptable to leave this option off, if somewhat boring. Alternatively, you could use -vv to be very verbose and list even more information about each file being unarchived. The -z option tells tar to run filename.tar.gz through gunzip first. And finally, the -f option tells tar that the next string on the command line is the file to operate on.
There are a few other ways to write this same command. On older systems lacking a decent copy of GNU tar, you might see it written like so:
% gunzip filename.tar.gz | tar -xvf - |
This command line will uncompress the file and send the output to tar. Since gzip will write its output to standard out if told to do so, this command will write the decompressed file to standard out. The pipe then sends it to tar for unarchiving. The “-” means to operate on standard input. It will unarchive the stream of data that it gets from gzip and write that to the disk.
Another way to write the first command line is to leave off the dash before the options, like so:
% tar xvzf filename.tar.gz |
You might also encounter a bzipped archive. The version of tar that comes with Slackware Linux can handle these the same as gzipped archives. Instead of the -z command line option, you'd use -j:
% tar -xvjf filename.tar.bz2 |
It is important to note that tar will place the unarchived files in the current directory. So, if you had an archive in /tmp that you wanted to decompress into your home directory, there are a few options. First, the archive could be moved into your home directory and then run through tar. Second, you could specify the path to the archive file on the command line. Third, you can use the -C option to “explode” the tarball in a specified directory.
% cd $HOME % cp /tmp/filename.tar.gz . % tar -xvzf filename.tar.gz % cd $HOME % tar -xvzf /tmp/filename.tar.gz % cd / % tar -xvzf /tmp/filename.tar.gz -C $HOME |
All the above statements are equivalent. In each case, the archive is unpacked inside your home directory and the original uncompressed archive is left in place.
So what good is being able to uncompress these archives if you can't make them? Well, tar handles that too. In most cases it's as easy as removing the “-x” option and replacing it with the “-c” option.
% tar -cvzf filename.tar.gz . |
In this command line, the -c option tells tar to create an archive, while the -z option runs the resulting archive file through gzip to compress it. filename.tar.gz is the file that you want to create.
Specifying the “-f” option isn't always necessary, but is typically good practice anyway. Without it, tar writes to standard output, which is usually desired for piping tar's output to another program, like so.
% tar -cv filename.tar . | gpg --encrypt |
That command creates an non-compressed tar archive of the current directory, pipes the tarball through gpg which encrypts and compresses the tarball, making it realistically impossible to read by anyone other than the person knowing the secret key.
15.4 zip
Finally, there are two utilities that can be used on zip files. These are very common in the Windows world, so Linux has programs to deal with them. The compression program is called zip(1), and the decompression program is called unzip(1).
% zip foo * |
This will create the file foo.zip, which will contain all the files in the current directory. zip will add the .zip extension automatically, so there's no need to include that in the file name. You can also recurse through the current directory, zipping up any directories that are also laying around:
% zip -r foo * |
Decompressing files is easy, as well.
% unzip foo.zip |
This will extract all the files in the file foo.zip, including any directories in the archive.
The zip utilities have several advanced options for creating self-extracting archives, leaving out files, controlling compressed file size, printing out what will happen, and much more. See the man pages for zip and unzip to find out how to use these options.
Chapter 16 Vi
- Table of Contents
- 16.1 Starting vi
- 16.2 Modes
- 16.3 Opening Files
- 16.4 Saving Files
- 16.5 Quitting vi
- 16.6 vi Configuration
- 16.7 Vi Keys
vi(1) is the standard Unix text editing program, and while mastering it is not as essential as it once was, is still a very rewarding goal. There are several versions (or clones) of vi available, including vi, elvis, vile, and vim. One of these is available on just about any version of Unix, as well as on Linux. All of these versions include the same basic feature set and commands, so learning one clone should make it easy to learn another. With the variety of text editors included with Linux distributions and Unix variants these days, many people no longer use vi. Still, it remains the most universal text editor across Unix and Unix work-alikes. Mastering vi means you should never be sitting at a Unix machine and not be comfortable with at least one powerful text editor.
vi includes a number of powerful features including syntax highlighting, code formatting, a powerful search-and-replace mechanism, macros, and more. These features make it especially attractive to programmers, web developers, and the like. System administrators will appreciate the automation and integration with the shell that is possible.
On Slackware Linux, the default version of vi available is elvis. Other versions - including vim and gvim - are available if you've installed the proper packages. gvim is an X Window version of vim that includes toolbars, detachable menus, and dialog boxes.
16.1 Starting vi
vi can be started from the command line in a variety of ways. The simplest form is just:% vi |
:q |
:q! |
You can also start vi with a pre-existing file. For example, the file /etc/resolv.conf would be opened like so:
% vi /etc/resolv.conf |
% vi +47 /usr/src/linux/init/main.c |
16.2 Modes
vi operates in various modes, which are used to accomplish various tasks. When you first start vi, you are placed into command mode. From this point, you can issue various commands to manipulate text, move around in the file, save, quit, and change modes. Editing the text is done in insert mode. You can quickly move between modes with a variety of keystrokes, which are explained below.16.2.1 Command Mode
You are first placed into command mode. From this mode, you cannot directly enter text or edit what is already there. However, you can manipulate the text, search, quit, save, load new files, and more. This is intended only to be an introduction to the command mode. For a description of the various commands, see Section 16.7.Probably the most often used command in command mode is changing to insert mode. This is accomplished by hitting the i key. The cursor changes shapes, and -- INSERT -- is displayed at the bottom of the screen (note that this does not happen in all clones of vi). From there, all your keystrokes are entered into the current buffer and are displayed to the screen. To get back into command mode, hit the ESCAPE key.
Command mode is also where you move around in the file. On some systems, you can use the arrow keys to move around. On other systems, you may need to use the more traditional keys of “hjkl”. Here is a simple listing of how these keys are used to move around:
Simply press a key to move. As you will see later, these keys can be combined with a number to move much more efficiently.
Many of the commands that you will use in command mode begin with a colon. For example, quitting is :q, as discussed earlier. The colon simply indicates that it is a command, while the “q” tells vi to quit. Other commands are an optional number, followed by a letter. These commands do not have a colon before them, and are generally used to manipulate the text.
For example, deleting one line from a file is accomplished by hitting dd. This will remove the line that the cursor is on. Issuing the command 4dd would tell vi to remove the line that the cursor is on and the three after that. In general, the number tells vi how many times to perform the command.
You can combine a number with the movement keys to move around several characters at a time. For example, 10k would move up ten lines on the screen.
Command mode can also be used to cut and paste, insert text, and read other files into the current buffer. Copying text is accomplished with the y key (y stands for yank). Copying the current line is done by typing yy, and this can be prefixed with a number to yank more lines. Then, move to the location for the copy and hit p. The text is pasted on the line after the current one.
Cutting text is done by typing dd, and p can be used to paste the cut text back into the file. Reading in text from another file is a simple procedure. Just type :r, followed by a space and the file name that contains the text to be inserted. The file's contents will be pasted into the current buffer on the line after the cursor. More sophisticated viclones even contain filename completion similar to the shell's.
The final use that will be covered is searching. Command mode allows for simple searching, as well as complicated search-and-replace commands that make use of a powerful version of regular expressions. A complete discussion of regular expressions is beyond the scope of this chapter, so this section will only cover simple means of searching.
A simple search is accomplished by hitting the / key, followed by the text that you are searching for. vi will search forward from the cursor to the end of the file for a match, stopping when it finds one. Note that inexact matches will cause vi to stop as well. For example, a search for “the” will cause vi to stop on “then”, “therefore”, and so on. This is because all of those words do match “the”.
After vi has found the first match, you can continue on to the next match simply by hitting the / key followed by enter. You can also search backwards through the file by replacing the slash with the ? key. For example, searching backwards through the file for “the” would be accomplished by typing ?the.
16.2.2 Insert Mode
Inserting and replacing text is accomplished in insert mode. As previously discussed, you can get into insert mode by hitting i from command mode. Then, all text that you type is entered into the current buffer. Hitting the ESCAPE key takes you back into command mode.Replacing text is accomplished in several ways. From command mode, hitting r will allow you to replace the one character underneath the cursor. Just type the new character and it will replace the one under the cursor. You will then be immediately placed back into command mode. Hitting R allows you to replace as many characters as you'd like. To get out of this replacement mode, just hit ESCAPE to go back into command mode.
There is yet another way to toggle between insertion and replacement. Hitting the INSERT key from command mode will take you into insert mode. Once you are in insert mode, the keyboard's INSERT key serves as a toggle between insert and replace. Hitting it once will allow you to replace. Hitting it once more will once again allow you to insert text.
16.3 Opening Files
vi allows you to open files from command mode as well as specifying a file on the command line to open. To open the file /etc/lilo.conf::e /etc/lilo.conf |
If you want to reopen the current file, you can do so simply by typing e!. This is particularly useful if you have somehow messed up the file and want to reopen it.
Some vi clones (for example, vim) allow for multiple buffers to be open at the same time. For example, to open up the file 09-vi.sgml in my home directory while another file was open, I would type:
:split ~/09-vi.sgml |
16.4 Saving Files
There are several ways to save files in vi. If you want to save the current buffer to the file randomness, you would type::w randomness |
On occasion, you want to save a file that is marked as read-only. You can do this by adding an exclamation point after the write command, like so:
:w! |
16.5 Quitting vi
One way to quit vi is through :wq, which will save the current buffer before quitting. You can also quit without saving with :q or (more commonly) :q!. The latter is used when you've modified the file but do not wish to save any changes to it.On occasion, your machine might crash or vi might crash. However, both elvis and vim will take steps to minimize the damage to any open buffers. Both editors save the open buffers to a temporary file on occasion. This file is usually named similarly to the open file, but with a dot at the beginning. This makes the file hidden.
This temporary file gets removed once the editor quits under normal conditions. This means that the temporary copy will still be around if something crashes. When you go back to edit the file again, you will be prompted for what action to take. In most cases, a large amount of your unsaved work can be recovered. elvis will also send you a mail (from Graceland, oddly enough :) telling you that a backup copy exists.
16.6 vi Configuration
Your vi clone of choice can be configured in several ways.A variety of commands can be entered while in command mode to set up vi just how you like it. Depending on your editor, you can enable features to make programming easier (like syntax hilighting, auto-indenting, and more), set up macros to automake tasks, enable textual substitutions, and more.
Almost all of these commands can be put into a configuration file in your home directory. elvis expects a .exrc file, while vim expects a .vimrc file. Most of the setup commands that can be entered in command mode can be placed in the configuration file. This includes setup information, textual substitutions, macros, and more.
Discussing all these options and the differences between the editors is quite an involved subject. For more information, check out the man page or web site for your preferred vi editor. Some editors (like vim) have extensive help within the editor that can be accessed with the :help command, or something similar. You can also check out the O'Reilly book Learning the vi Editor by Lamb and Robbins.
Many common programs in Linux will load up a text file in vi by default. For example, editing your crontabs will start up vi by default. If you do not like vi and would like another editor to be started instead, all you need to do is set the VISUAL environment variable to the editor you prefer. For information on setting environment variables, see the section called Environment Variables in Chapter 8. If you want to make sure that your editor will be the default every time you login, add the VISUAL setting to your .bash_profile or .bashrc files.
16.7 Vi Keys
This section is a quick reference of many common vi commands. Some of these were discussed earlier in the chapter, while many will be new.
Table 16-1. Movement
| Operation | Key |
|---|---|
| left, down, up, right | h, j, k, l |
| To the end of the line | $ |
| To the beginning of the line | ^ |
| To the end of the file | G |
| To the beginning of the file | :1 |
| To line 47 | :47 |
Table 16-2. Editing
| Operation | Key |
|---|---|
| Removing a line | dd |
| Removing five lines | 5dd |
| Replacing a character | r |
| Removing a character | x |
| Removing ten characters | 10x |
| Undo last action | u |
| Join current and next lines | J |
| Replace old with new, globally | %s'old'new'g |


No comments:
Post a Comment